Motion graphics terms as Adobe defines them: comps, precomps, nulls, parenting, easy ease, track mattes, blending modes and alpha, through to ProRes 4444.
Method. Checked November 18, 2026 against Adobe's After Effects Help pages (compositions, layers, interpolation, speed, masks, track mattes, blending modes, expressions, time remapping, tracking, Roto Brush, 3D, rendering) and Apple's April 2022 ProRes white paper; the Easy Ease frame split is our arithmetic. Vinc makes an AI film studio.
How to use this part
Motion graphics and 2D compositing share one vocabulary, most of it from Adobe After Effects. This part defines it in the order you meet it: structure, animation, compositing, time, output. Definitions are quoted from Adobe's After Effects Help pages.
Adobe defines a composition as "a framework for a movie. Each composition has its own timeline." It holds layers you "arrange... in space and time and composite using transparency features," and "is similar to a sequence in Premiere."
Precomp (nesting)
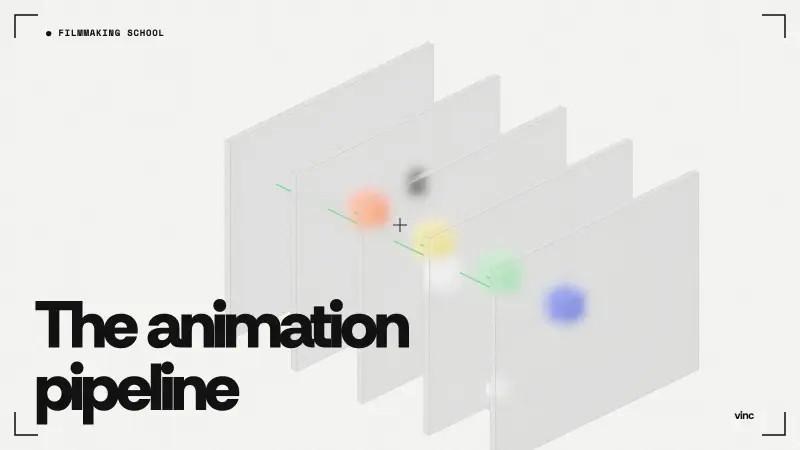
Precomposing moves selected layers into a new composition, which then "becomes the source for a single layer in the original composition." Nested comps are "upstream" of the comps that contain them; Adobe compares precomps to Smart Objects in Photoshop.
Data flows downstream: layers feed a precomp, the precomp becomes one layer in the main comp, and the main comp goes to render.
Layer types
Adobe divides layers into footage-based layers, layers "that you create within After Effects to perform special functions, such as cameras, lights, adjustment layers, and null objects," and "synthetic layers" such as shape and text layers that have no source footage.
Any colour, any size "up to 30,000x30,000 pixels"; new solids default to 17% grey (45/255)
Backgrounds, effect carriers
Shape
Vector layer drawn in After Effects; always continuously rasterised
Icons, lines, UI elements
Text
Vector text layer; can be made per-character 3D
Titles, kinetic type
Null object
"An invisible layer that has all the properties of a visible layer"
Parent and controller
Adjustment
Applies its effects "to the composite created from all layers below" it
One grade over many layers
Camera
Views 3D layers "from any angle and distance"
Moves through a 3D comp
Light
Parallel, Spot, Point, Ambient, plus Environment in the Advanced 3D renderer
Lighting and shadows for 3D layers
Transform properties and anchor point
The Transform group is "the basic group of properties that every layer has": Anchor Point, Position, Scale, Rotation and Opacity. The anchor point is the pivot: "Transformations, such as rotation and scale, occur around the anchor point." Adobe's example is moving a cut-out hand's anchor point to the wrist so it rotates from there.
Parenting
Parenting makes one layer follow another: the child's "transform properties... become relative to the parent layer instead of to the composition." It affects Position, Scale, Rotation and Orientation, "but not Opacity." A layer has one parent, a parent any number of children; nulls exist mostly to be parents.
Animation
Keyframe
A keyframe stores a property's value at a point in time. In After Effects, "any property with a stopwatch can be animated"; the software calculates the frames in between.
Interpolation: linear, Bezier and hold
Interpolation is how the software fills the frames between keyframes. "Temporal interpolation is the interpolation of values in time; spatial interpolation is the interpolation of values in space": Position has both, its speed and its path.
Method
Adobe's description
Looks like
Linear
"A uniform rate of change between keyframes, which can add a mechanical look"
Robotic starts and stops
Bezier
"The most precise control"; the two handles "operate independently"
Custom curves, sharp corners possible
Auto Bezier
"A smooth rate of change through a keyframe," handles adjust automatically
Default smooth motion
Continuous Bezier
Smooth like Auto Bezier, but you set the handles
Smooth, hand-shaped
Hold
Value "holds steady until the next keyframe, when the values change immediately"
Jumps, strobe, stepped animation
Auto Bezier, the default spatial interpolation, can cause "undesired back-and-forth (boomerang) motion" between two equal keyframes; set those keys to Hold or Linear.
Easy ease
Easy Ease is a one-click slow-in and slow-out: "each keyframe has a speed of 0 with an influence of 33.33% on either side," so an object "slows down as it approaches a keyframe, and gradually accelerates as it leaves." It is the software version of Disney's slow in and slow out (part 14).
Our arithmetic: a one-second move at 24 fps with Easy Ease on both keyframes. Each handle's 33.33% influence spans roughly the first and last 8 frames.
Graph editor: value graph vs speed graph
The Graph Editor replaces the layer bars with curves. The value graph shows "the values for each keyframe and the interpolated values between keyframes"; the speed graph shows "the rate of change (speed) of the property." In the speed graph, pulling an influence handle toward the neighbouring keyframe makes a longer, gentler ease.
Motion path
A motion path is the spatial trajectory of a Position animation, drawn in the Composition panel. "Each dot represents a frame," and "even spacing indicates a constant speed and wider spacing indicates a higher speed," so a path's shape and its speed are set separately.
Expressions (wiggle, loopOut)
An expression is a short piece of JavaScript on a property that calculates its value every frame. Two cover most everyday use:
wiggle(freq, amp) "randomly shakes (wiggles) the value of the property," with frequency in "wiggles per second."
loopOut(type) repeats keyframed animation after the last keyframe: "cycle" (the default), "pingpong" or "offset", which keeps a rotation turning instead of snapping back.
// A gentle handheld drift on Position: about 1 wiggle per second, 8 pixels
wiggle(1, 8)

// Keep repeating the keyframed rotation forever
loopOut("cycle")
Compositing
Masks and feathering
Adobe defines a mask as "a path that is used as a parameter to modify layer attributes, effects, and properties," most often a layer's alpha. Feather softens the edge: "By default, the feather width straddles the mask edge, half inside and half outside," with "a Gaussian distribution" falloff.
Track matte (alpha and luma)
A track matte lets one layer "show through holes defined by another layer," using the matte layer's alpha or luminance. A moving matte is a traveling matte.
Track matte
Opaque where
Alpha Matte
Matte's alpha is 100%
Alpha Inverted Matte
Matte's alpha is 0%
Luma Matte
Matte's luminance is 100%
Luma Inverted Matte
Matte's luminance is 0%
Luma mattes work with layers that have no alpha, such as smoke footage. The classic use is video showing through text.
Blending modes
A blending mode decides how a layer's pixels combine with the layers below. Adobe's definitions of the four most used:
Mode
What it does
Result
Multiply
Multiplies source and underlying channel values
"Never brighter than the original"; white disappears
Screen
"Multiplies the complements... then takes the complement of the result"
"Never darker"; black disappears; like projecting two slides on one screen
Add
Sums the channel values
"Never darker than either input color"; hot highlights
Overlay
Multiplies or screens "depending on whether... the underlying color is lighter than 50% gray"
Adds contrast, keeps highlights and shadows
Screen lets light leaks, flares and fire shot on black sit over footage without keying; Multiply does the same for dark elements shot on white.
Alpha channel: straight vs premultiplied
The alpha channel is the fourth channel of an RGBA image, usually carrying transparency: white opaque, black transparent. "With straight (or unmatted) channels, transparency information is stored only in the alpha channel"; premultiplied (matted) channels also store it in RGB, "multiplied with a background color."
Straight channels "retain more accurate color information"; premultiplied ones work in more programs. Interpreting one as the other gives a dark or light fringe: "if a color inaccuracy, such as a halo, appears along the semitransparent edges... try changing the interpretation method."
ProRes 4444 with alpha
ProRes 4444 is the usual codec for delivering a graphic with transparency as video. Apple's April 2022 white paper says ProRes 4444 XQ and ProRes 4444 "are the only ProRes codecs that support alpha channels," with "a mathematically lossless alpha channel up to 16 bits." In After Effects, choose RGB+Alpha in the output module.
Motion and time
Motion blur: shutter angle and shutter phase
After Effects simulates a rotary shutter: shutter angle "is measured in degrees, simulating the exposure allowed by a rotating shutter." "Entering 90° (25% of 360°) for 24-fps footage creates an effective exposure of 1/96 of a second." Shutter phase "defines an offset that determines when the shutter opens relative to the beginning of a frame."
After Effects' shutter angle at 24 fps: Adobe's 90° example gives 1/96 s; 180° gives 1/48 s and 360° gives 1/24 s.
To sit a graphic in live action, match the comp's shutter angle to the camera's, or it will look sharper than the world around it (our practice note).
Frame blending
Frame blending fills the gaps when footage is slowed down or sped up and frames repeat or skip. "Frame Mix takes less time to render, but Pixel Motion provides much better results, especially for footage that has been drastically slowed down."
Time remapping
Time remapping turns a clip's time into an animatable property: each keyframe says which source frame plays when, so you can speed up, slow down, reverse or freeze within one layer.
Motion tracking and stabilisation
Motion tracking follows a feature across frames "and then appl[ies] the tracking data for that movement to another object." Stabilisation uses the data "to compensate for movement of an object in that layer." The 3D Camera Tracker solves a full camera move; the Warp Stabilizer smooths shaky footage automatically.
Roto Brush
Roto Brush separates a foreground subject from its background over time: you paint strokes on one frame and the selection propagates. The Next-Gen Roto Brush is "powered by a brand-new AI model," and Refine Edge handles "highly detailed edges like hair."
3D layers and cameras
A 3D layer stays flat but gains depth: Position, Anchor Point and Scale get a z value, and "z (depth) increases from near to far." Camera presets "are named according to focal lengths" of "a 35mm camera"; the default is 50mm. A two-node camera "has a point of interest and orients around that point."
What a focal-length preset changes: the horizontal angle of view of a 36 × 24 mm (35 mm still) frame at 50 mm, the default, and at 24 and 135 mm. Computed with 2·arctan(18 ÷ focal length); our illustration.
An After Effects camera layer can be moved like a physical camera; a two-node camera stays aimed at its point of interest while it moves.
Output
Render Queue
The Render Queue is "the primary way of rendering and exporting movies from After Effects." Several output modules on one item give several files (say, a ProRes 4444 master and an H.264 review copy) from one render.
Adobe Media Encoder
Media Encoder is Adobe's separate encoding application, recommended for files "compressed for the web, DVD, or Blu-ray disc." It lets you "continue working in After Effects while files are being processed."
Where each term sits in an After Effects job, from structure to delivery.
How the terms connect in practice
A lower-third title uses most of them:
Text and shape layers parented to a null, brought in with Easy Ease keyframes, shaped in the speed graph.
A track matte reveals the text; a screen-mode light sweep adds a highlight.
Motion blur at the plate's shutter angle; precomped for reuse; rendered as ProRes 4444 with straight alpha.
How we compiled this
After Effects definitions are quoted or paraphrased from Adobe's After Effects Help pages, read on 18 November 2026. ProRes figures come from Apple's April 2022 white paper. The Easy Ease frame split and lower-third example are our illustrations.
Aspect Ratios in Film Explained: 1.33 to 2.39 and 9:16, With the History and Delivery Specs
Aspect ratios in film are width divided by height. See where 1.375, 1.85, 2.39, 16:9, IMAX and 9:16 came from, and the containers cinemas and Netflix expect.